If you like this Christmas bouquet of Christmas beads, I would like you to have a Christmas tree made from a beautiful Hama beads as a Christmas decoration in your home these days when Christmas Day is approaching. For this purpose, I decided to tell you step by step in this article “How to make Christmas tree with Hama beads”. I am sure you will appreciate the 3d designs described below.
How to make 3d Hama Beads? Which Bead Material Information Required for Christmas Tree Designs
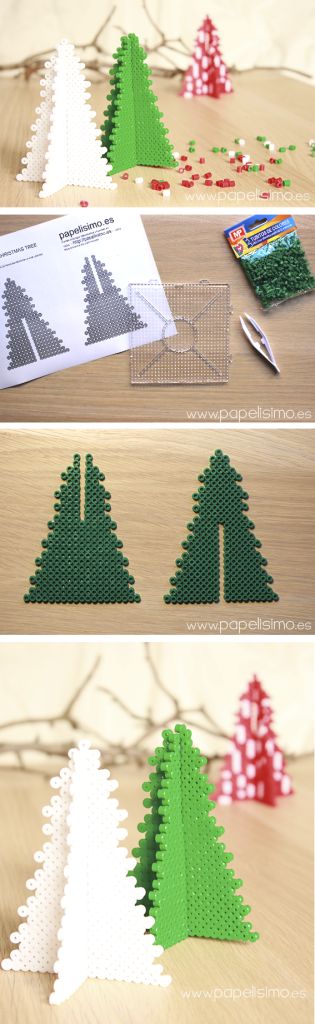
Now that you’ve decided to design a 3d Hama bead, today, I will tell you how a 3D Hama beaded Christmas tree made. This design will be made in small sizes and will be a nice decor for table decor or showcase.
Here are the ingredients for this decor:
- Hama beads in green, red, yellow and brown colors (you will need more green and brown)
- Square screen
- Printing paper
- Bar
Instructions for preparing 3D Hama bead designs are also listed below;
Step 1: Basic Hama bead Christmas tree preparation
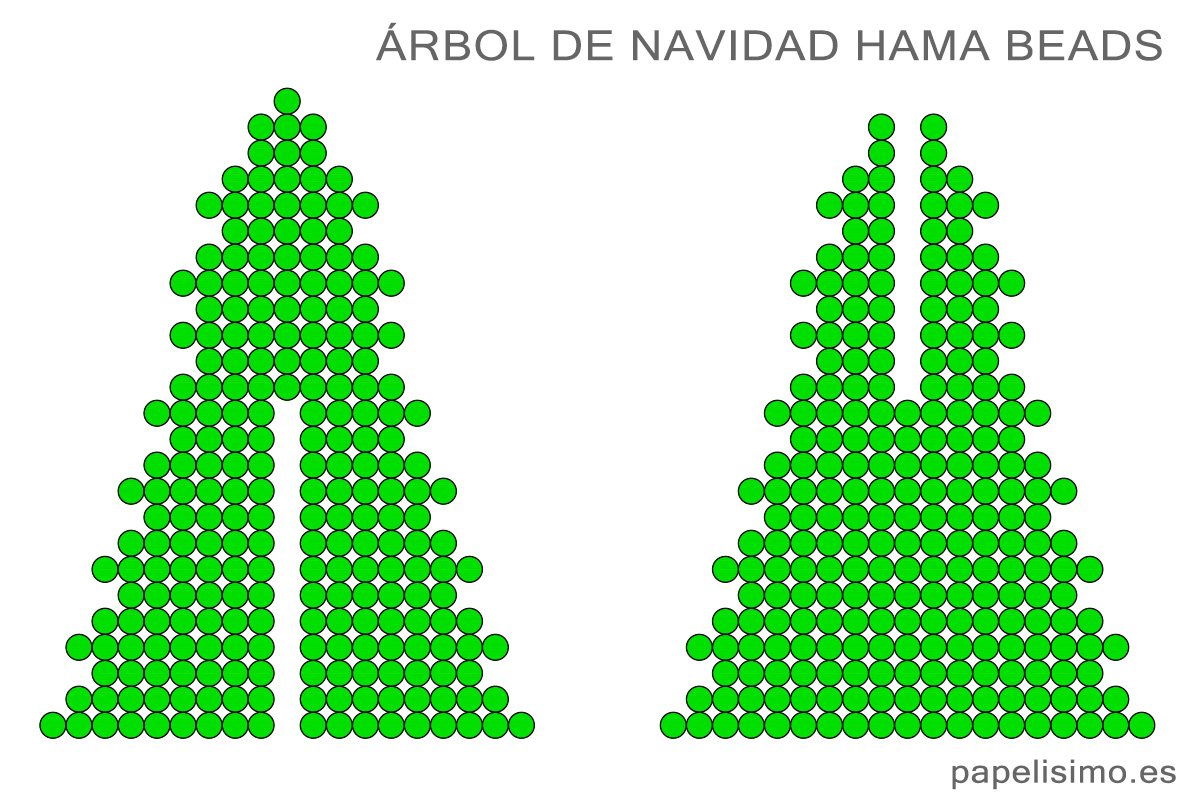
We start by making a part of 3d Christmas tree. Let’s start by creating a tree shape as seen in the picture, pay attention to the number of Hama beads and the color, print the Hama bead with the stick at the place you prepared for the Christmas tree.
Step 2: Prepare the main body
Create a 3 x 3 square from 9 brown Hama beads that are part of the Christmas tree stand and create a square shape to draw a “T” on both sides, you need 8 yellow Hama beads for this.
Step 3: Press the bar with the iron bar as shown in the picture.
Step 4: Now you have to prepare another piece of 3d Christmas tree. Make your designs and placements in accordance with the shapes shown in the pictures, and then press down with a stick after finishing.
Step 5: At this stage, as shown in the picture, you will prepare the main tree of the Christmas tree. Make enough body for it by using brown.
Stage 6: As you can see in the next picture, press the tree with the stick on the bead wood. From now on you must have finished the two-piece Christmas tree.
Step 7: Finish your design by completing fine details.
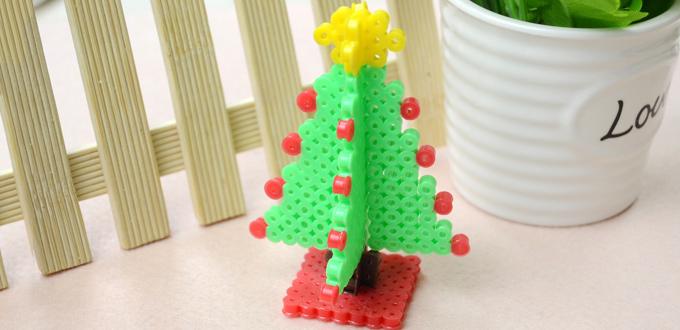
Gently tie the two pieces together and follow the illustrations to make a square of 11 x 11 using the 44 red Hama beads as shown, reprint with the stick and place your previous design on it.
Attention!!! These products should eventually be ironed, but this process should only be done by adult individuals. Children should not be assigned to this process as the vapors may harm the children. Turn it into an advantage as a parent-child collaboration. However, guard your children at this stage and, if possible, keep them away from the iron.
That’s it, now you’re ready for 3d Hama Christmas tree.