

Bookcases, are furnitures that make an excellent contribution to home decor. In particular, you can see large libraries of literature-loving and book-reading people. We will share the library design, not like the ordinary libraries. Let’s look on how to do it by yourself.
Let’s look what you need: 1″ x 4″ x 8′ pine board, 1″ x 2″ x 8′ pine trim 8’ crown moulding, caulk and paint color which matches with bookcase. With these dimensions You have to do some cuts.
1)Cut from the pine board two 11″ pieces
2)Cut from the pine trim two 11’’ pieces
3)Cut from the pine trim ½’’ pieces
4)Cut from board ½’’ pieces
5)Cut from the crown moulding ½’’ pieces at 90 degrees
6)Cut from the crown moulding 11’’ at 90 degrees
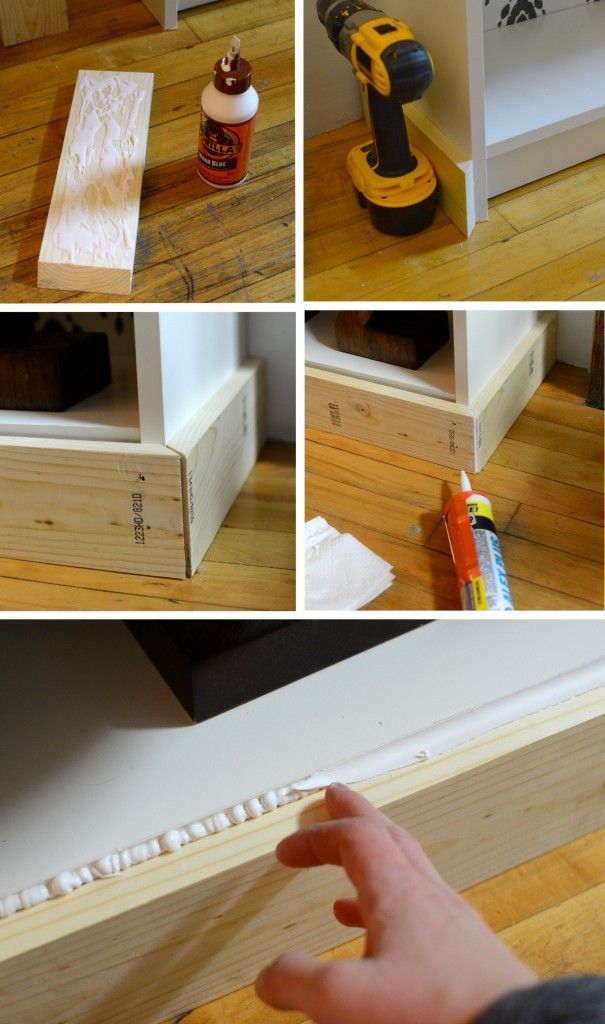
Firstly, glue the 1 cuts to the outside part of the bookcase. Wait them to dry. Then glue dhe 4 cuts to the front part of the bookcase. Add caluck to the gaps between the bookcase and smooth them with your finger.
The body is ready. Now, start doing the top of the bookcase. Glue the 2 cuts to the top of the bookcase. Put something heavier on them to dry. Take the 3 and 5 cuts. Glue the 3 and 5 cuts with the nail. Repeat it with the 6 cuts.
If you don’t want to hve a crown corners, you can cut the pieces of the crown to the 45 degrees. You will have the right dimensions if you apply these dimensions. Let them dry all the night. The next day, just paint the corners with the color which matches. You can use different colors that match. ,
Here you can see the result in the photos. Try and have a crowned bookcase.